How to Setup Brother Sewing Machine: A Guide for New Users
Excited to setup your Brother sewing machine and start using it right away? Join our detailed guide to grasp every bit of vital information on how to setup Brother sewing machine and make the procedure effortless. Brother produces innovative and computerized sewing machines that make the sewing process effortless, even for the beginner. Plus, some machines also come with features like embroidery. However, these smart sewing tools need to be setup before they can be used.

Moreover, using and
setting up the sewing machine is easy if you already know the process. But, if
it is your first time using the machine, then it is prudent to learn about the
whole setup process. So, make sure to stick to this blog until the end and
setup the machine with utmost ease.
Step 1: Connecting the Machine to a Power Source
Brother sewing
machines are innovative electronic machines that require a power supply to run
them. If you want to learn how to setup a sewing machine, then the first step
is to connect it to a power source. Take the provided USB cable and connect it
to the power socket (usually on the right side of the machine). Press the
button on the machine to turn it on.
Step 2: Adding the Foot Pedal
If you want to use
your sewing machine with a pedal, then you need to attach it. However, sewing
machines are computerized and can be used without the help of the pedals.
Note: Your Brother sewing machine may also come with the
Start/Stop button that you can use to control your machine during sewing.
Moreover, getting knowledge about the pedal is also prudent as it could be
fruitful for further uses in the future.
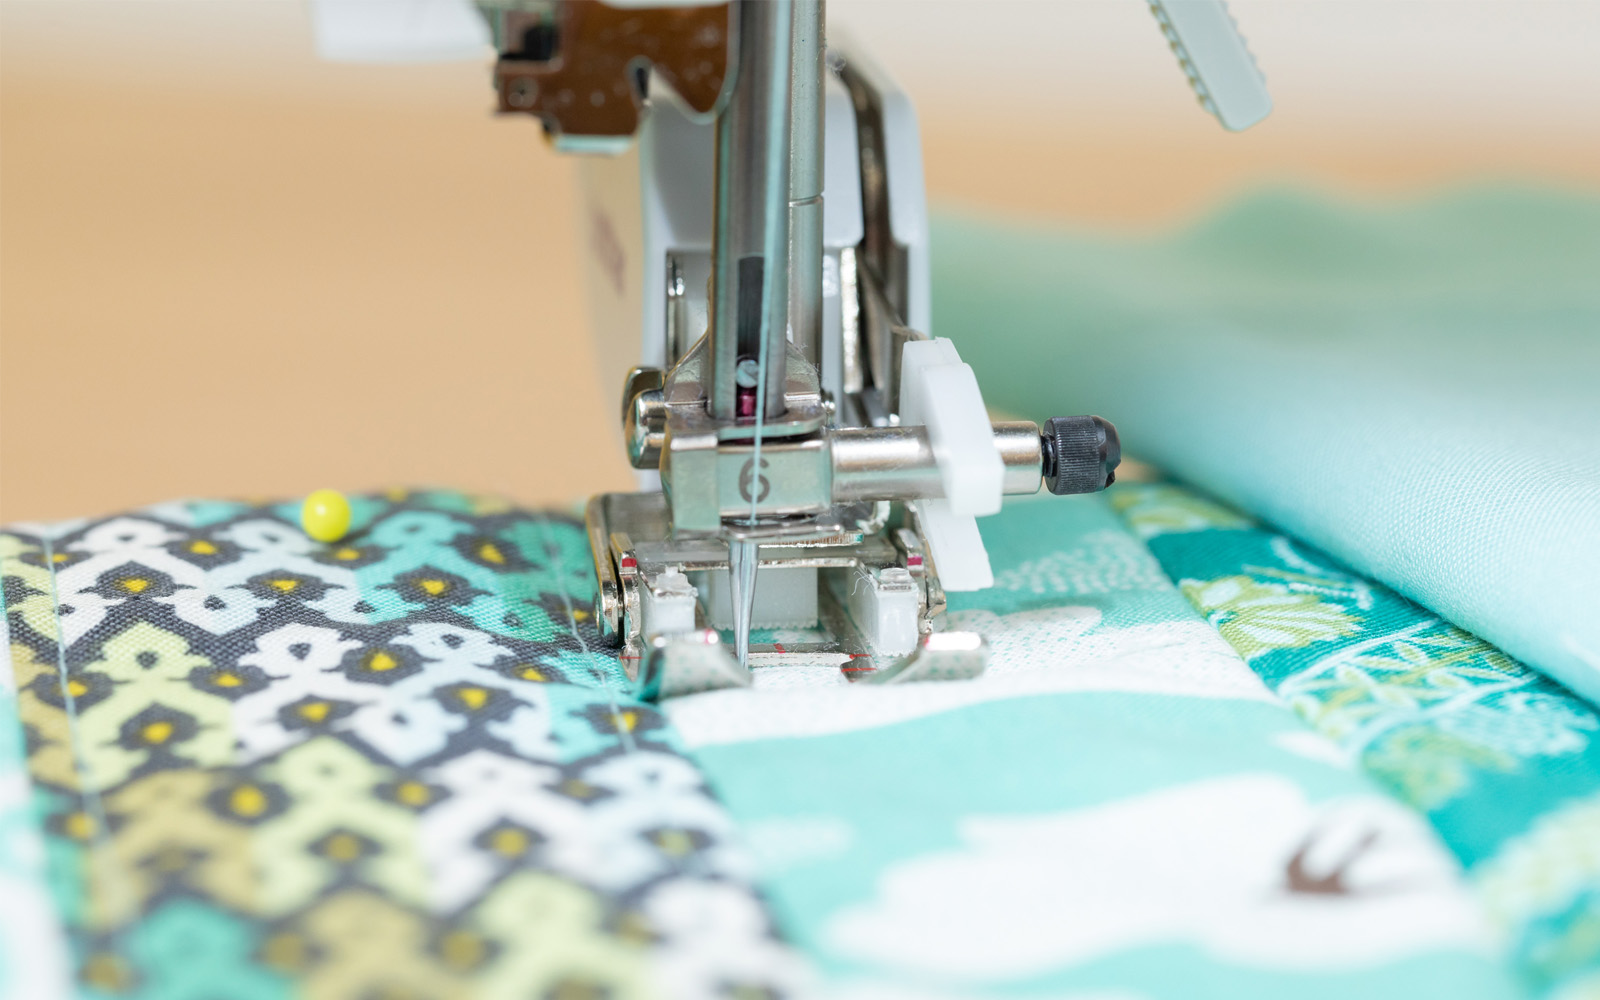
Step 3: Confirming the Presser Feet
The presser feet are the attachment that helps keep the materials flat when you feed them into your machine. As a result, it is necessary to check the presser feet to sew the materials smoothly. You need to lift up and down the presser feet to make sure they are working properly. You can also change the presser feet by removing the screw attached above it.

In addition, if you are using the sewing machine, you can locate the button/icon for presser feet and use it to change the feet. Your machine may come with a variety of presser feet that help complete the different operations on your device.
Note: You should first feel behind the shaft that holds
the presser feet & needle to find the black release lever if you want to
remove the presser feet. You need to push this lever down, but make sure that
the presser feet are raised) and you will see that the presser feet come off
easily. After that, you can remove the old feet and replace them with new ones.
Make sure to carefully lower the shaft until you hear a clicking sound so you
can place the presser feet properly.
Step 4: Inserting the Needle

Once the above procedures are done properly, it is time to insert the needle into your sewing machine. You can choose a new needle that comes with your machine purchase. You must know that there are different types of sewing needles that are used for the various types of materials. You can gather more guidance and information to change them.
Follow-ups are the steps you can follow to properly insert the needle in your sewing machine.
- Take a screwdriver and unscrew the black screw from the
shaft of your needle holder.
- Next, take the needle and insert it into the shaft.
- Then, tighten the screw back to its place.
- Now, make movement in the needle shaft to check that it is set properly.
Note: When you have to change the needle of your
machine, make sure to keep a piece of clothing under the presser's feet so it
does not slip and fall. In addition, if the needle gets to feed dogs below the
machine, then further complications can result.
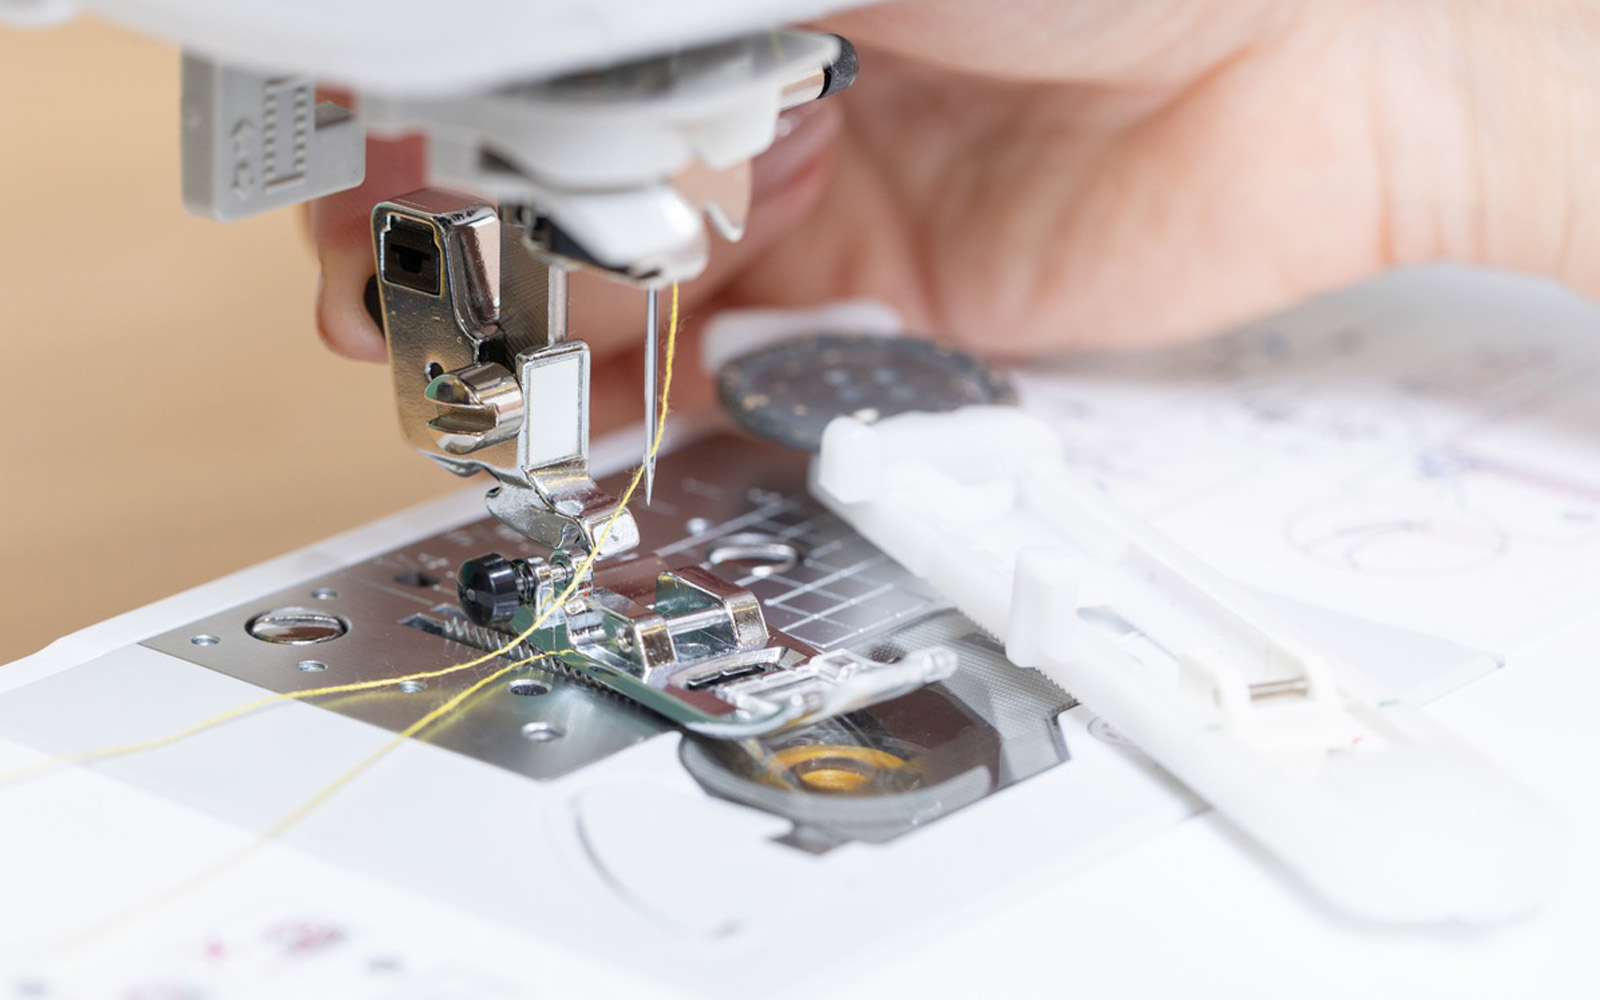
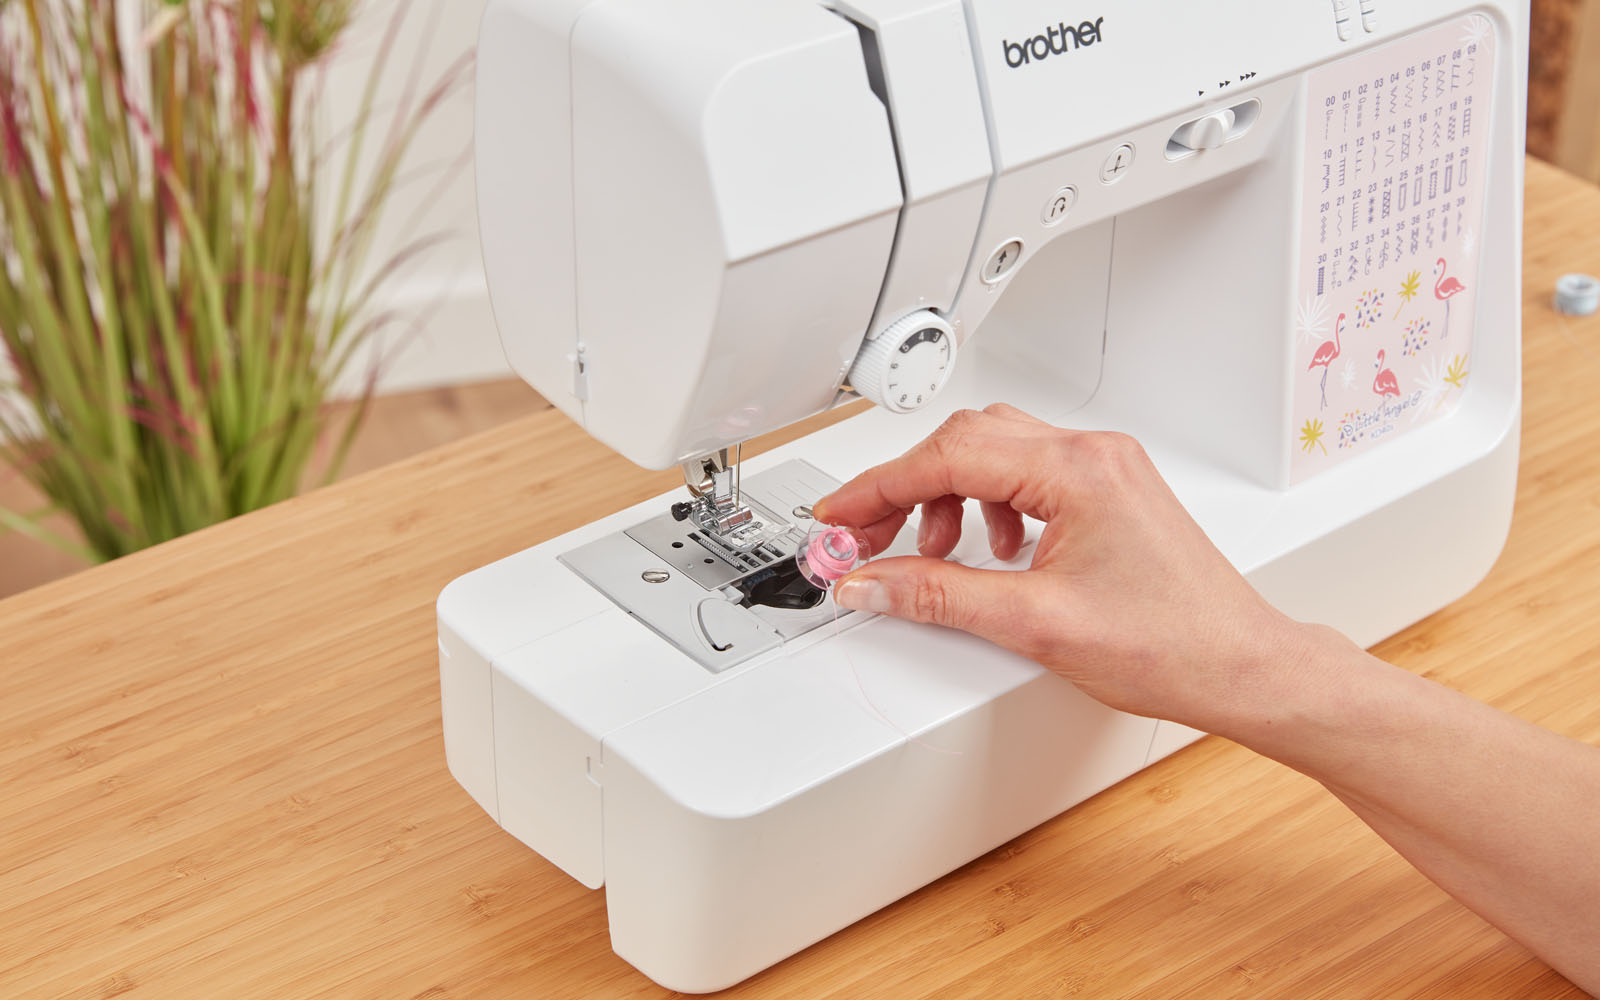
Step 5: Threading the Machine
The last but most important part of how to setup Brother sewing machine is threading. If you do not complete this procedure correctly, then your machine is going to end up with bad stitches. Therefore, the following is a quick step-by-step guide that will help you thread your machine.
- Begin by
inserting the bobbin into your sewing machine.

- Then,
you should raise the foot presser and pass the thread through the tension
plates.
- Now, take the thread and pass it through the thread take-up
lever at the top of the machine.

- After
that, you need to insert the thread into your machine. (Now, most Brother
sewing machines come with a button or level that allows you to thread the
needle automatically.
- Here you
go! Your Brother sewing machine
setup is complete and ready to use. Perform a test sewing on a small
piece of material to confirm the machine is working properly.
Final Words
Here, we have shared
all the need-to-know info on how to
setup Brother sewing machine. We hope that by using these procedures, you
are able to complete your machine setup without facing any issues. However, if
you need more help or any problem is happening during the setup, then it is
best to gather more info and guidance to finish the process easily.
Frequently Asked Questions
How do I setup my Brother sewing machine?
These are the vital processes you need to complete to setup your sewing machine.
●
The first process is to turn on your smart sewing
machine.
●
Adding the foot pedal to the machine.
●
Confirming the presser feet and connecting it.
●
Next, you need to insert the right size needle.
●
Now, thread your machine, and it will start the
sewing process.
Which needle is best for a Brother sewing machine?
You can use a
variety of needles in your sewing machine, depending on the materials you are
using. If you want to get the sewing patterns using monogramming foot
"N," then a pointed needle is best for great results. For that, you
can go for HG-4BR (Organ) and "JERSEY BALL POINT" 130/705H SUK 90/14,
which are also good substitutes. Apart from that, you can use the 90/14 to
100/16 needle regardless of the materials you are going to sew.
Why am I facing an issue in setting up my Brother sewing machine?
Brother mostly
produces smart and electronic sewing machines that come with computerized
features. The process of setting up this machine is a little more complicated
than that of the traditional manual sewing machine. As a result, it is common
to face some challenges while setting up a new Brother sewing machine for the
first time. To complete the setup process of your machine easily, you need to
acquire a full understanding of the process or seek additional assistance.


Comments
Post a Comment